WhisperClick-Desktop-App
Getting Started with WhisperClick
WhisperClick turns your voice into text anywhere on your desktop. Press a hotkey, talk, and the transcription appears right where your cursor is. No window switching, no copy-paste – it just works.
This guide walks you through installation, setup, and everyday use.
Table of Contents
Download and Install
Where to get it
Download WhisperClick from the official website or GitHub:
- Website: whisperclick.com
- GitHub Releases: Latest release
Choose your platform
| Platform | Download | Notes |
|---|---|---|
| Windows | Setup Installer (.exe) or Portable (.exe) | Fully tested and stable |
| macOS (Apple Silicon) | DMG (M1/M2/M3/M4) | Early access |
| macOS (Intel) | DMG (2015–2020 Macs) | Early access |
| Linux | AppImage | Early access |
Installer vs. Portable (Windows)
- Setup Installer – Installs to your Program Files, creates a Start Menu shortcut, and enables auto-updates. This is the recommended option for most users.
- Portable – A single .exe file you can run from anywhere (a USB drive, your Downloads folder, etc.). No installation required. Good if you want to try it without installing.
Windows SmartScreen warning
WhisperClick is not yet code-signed, so Windows may show a SmartScreen warning when you first run it. This is normal for new, independent software.
To get past it:
- When you see “Windows protected your PC,” click More info
- Click Run anyway
This only happens once. After the first launch, Windows remembers your choice.
macOS Gatekeeper warning
On macOS, you may see a message saying the app “can’t be opened because it is from an unidentified developer.”
To get past it:
- Open System Settings (or System Preferences on older macOS)
- Go to Privacy & Security
- Scroll down – you will see a message about WhisperClick being blocked
- Click Open Anyway
- Enter your password if prompted
Alternatively, you can right-click the app in Finder and select Open from the menu. This bypasses Gatekeeper for that specific launch.
After installation
WhisperClick auto-updates in the background once installed. You only need to download it once – future updates are delivered automatically, and you will see a notification when a new version is ready.
First Launch
When you open WhisperClick for the first time, you will see the onboarding screen.
Step 1: Choose your transcription method
WhisperClick offers two ways to transcribe your voice:
Cloud API (recommended for most users)
- Fast, accurate, and supports 50+ languages
- Requires an API key from OpenAI or Google Gemini
- Typical cost: under $1/month for normal use
Local mode (fully offline)
- All processing happens on your computer – nothing is sent to the internet
- Requires downloading a Whisper model (300 MB to 3 GB depending on the model)
- Works without an internet connection
- May be slower depending on your hardware
Step 2: Set up an API key
If you chose cloud transcription, you need an API key from one of these providers:
| Provider | Where to get a key | What you get |
|---|---|---|
| OpenAI | platform.openai.com/api-keys | GPT-4o Transcribe, Whisper, and more |
| Google Gemini | aistudio.google.com/apikey | Gemini 2.5 Flash, Pro, and newer models |
To set up your key:
- Visit your provider’s website and create an API key
- Copy the key
- In WhisperClick’s onboarding screen, select your provider from the dropdown
- Paste your key into the API key field
- WhisperClick verifies the key format automatically – a green checkmark means you are good to go
- Click Continue
Your API key is encrypted and stored securely using your operating system’s built-in credential manager. It is never saved in plain text.
Step 3: Set up local mode (optional)
If you chose local mode instead:
- WhisperClick will show you a list of available Whisper models
- Pick a model (smaller models are faster but less accurate; larger models are slower but more accurate)
- Click Download – a progress bar shows the download status
- Once the download finishes, you are ready to go
You can switch between local and cloud mode at any time in Settings.
What you see after setup
After onboarding, you land on the main WhisperClick window:
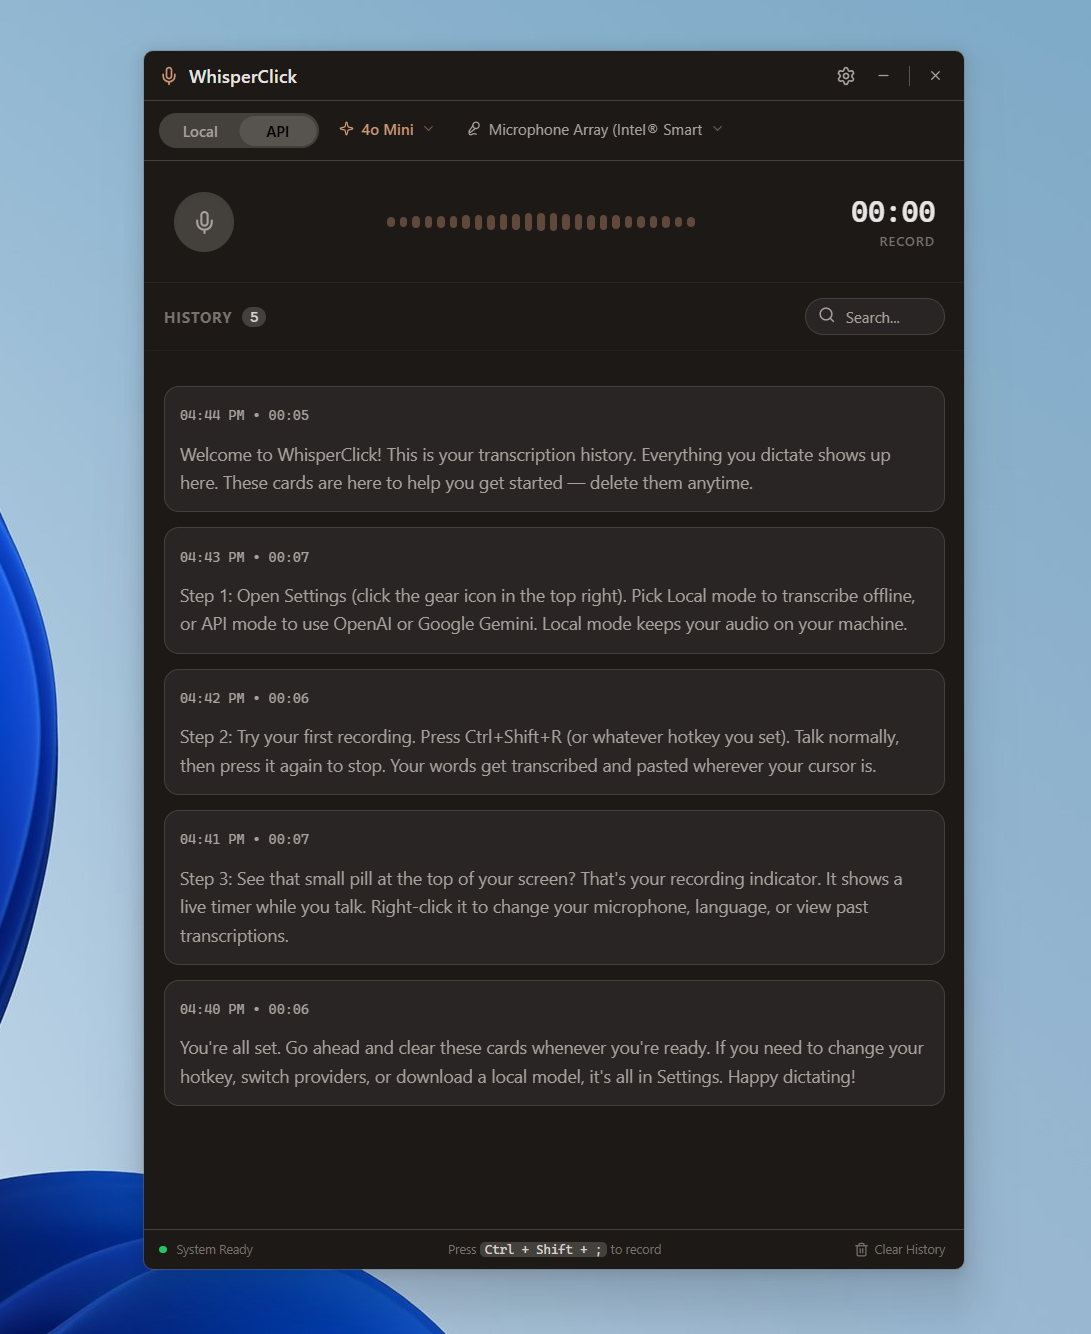
- A large microphone area in the center – click it or press the hotkey to start recording
- An audio visualizer that shows activity while you speak
- Access to your transcription history and settings
Basic Usage
The core workflow
- Put your cursor where you want text to appear (an email, a chat message, a document – anywhere)
- Press Ctrl+Alt+R (the default hotkey)
- Talk naturally – say whatever you want to type
- Press Ctrl+Alt+R again to stop recording
- Your words appear at your cursor, already pasted
That is the whole workflow. You do not need to switch to WhisperClick’s window, copy text, or paste anything manually. The transcription lands right where your cursor was.
Recording indicators
While recording, you will notice:
- The main window shows a pulsing “Listening…” label, active visualizer bars, and a timer counting up
- The pill widget (a small floating capsule at the edge of your screen) expands to show audio activity and stop/cancel buttons
- The system tray icon turns red to indicate active recording
Stopping vs. canceling
- Stop (press the hotkey again, or click the stop button): Stops recording and sends audio for transcription. Your text will be pasted in a moment.
- Cancel (click the X button on the pill, or click during the processing phase): Discards the audio entirely. Nothing is transcribed, nothing is pasted.
The floating pill widget
The pill is a small widget that sits at the edge of your screen:
| State | What it looks like |
|---|---|
| Idle | A tiny dark capsule with miniature voice bars |
| Recording | Expands with animated bars, a cancel (X) button, and a stop button |
| Processing | Pulsing animation while transcription is in progress |
| Success | Brief green flash, then returns to idle |
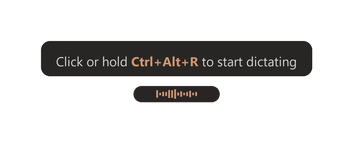
Hover over the pill to see a tooltip reminding you of the hotkey. You can also click the pill to start or stop recording – it works just like the hotkey.
Right-click the pill to access a quick menu with options for: starting/stopping a recording, opening the main window, opening settings, or hiding the pill.
Settings Overview
Open settings by clicking the gear icon in the main window, choosing Settings from the tray menu, or right-clicking the pill and selecting Settings.
Quick Settings
The most common options are right at the top:
| Setting | What it does |
|---|---|
| Theme | Switch between dark and light mode (or follow your system setting) |
| Auto-paste | When enabled, transcriptions are automatically pasted where your cursor is. When off, text is copied to your clipboard instead. |
| Sound effects | Play audio feedback on recording start, stop, and completion |
| Always on top | Keep the WhisperClick window above all other windows |
| Start with Windows | Launch WhisperClick automatically when you log in |
Provider and API Keys
- Mode toggle: Switch between Local and API transcription
- Provider: Choose OpenAI or Google Gemini
- API Key: Enter or update your key (stored encrypted)
- Model: Pick which model to use for transcription (each provider has several options)
Language and Output
- Output mode: Choose Transcribe (speech to text), Translate (speech to text in another language), or Both
- Source language: The language you are speaking (or Auto-detect)
- Target language: The language to translate into (shown only in Translate or Both mode)
Hotkey
- Current hotkey: Displays your active hotkey (default: Ctrl+Alt+R)
- Record new hotkey: Click the capture button, then press your desired key combination
- Manual entry: Click the hotkey display to type a combo directly
- WhisperClick warns you if your chosen hotkey conflicts with common system shortcuts
Appearance
- Visualizer style: Choose from 8 styles (Classic Bars, Spectrum Lines, Soft Pillars, Segmented Blocks, Neon Pulse, Prism Wave, Peak Spikes, Dot Matrix)
- Visualizer motion: Subtle, Balanced, or Energetic
- Pill widget: Show or hide the floating pill, and choose which monitor it appears on
Tips and Tricks
Auto-paste is the killer feature
With auto-paste enabled (it is on by default), you never touch the clipboard. Just put your cursor where you want text, press the hotkey, talk, press the hotkey again, and the text appears. This works in virtually every application: email clients, Slack, Discord, Google Docs, VS Code, terminals, browser text fields – anywhere you can type.
Use the pill widget for quick access
The pill sits unobtrusively at the edge of your screen. You can:
- Click it to start or stop recording (no hotkey needed)
- Drag it to reposition it anywhere on your screen
- Right-click it for quick access to settings and controls
- Move it to another monitor from Settings if you have a multi-display setup
If the pill gets in the way, hide it from Settings or the tray menu. You can still use the hotkey and tray to control recording.
System tray for a clean desktop
WhisperClick lives in your system tray when minimized. The tray icon changes color to show recording state:
- Terracotta – idle, ready to record
- Red – actively recording
- Green – transcription completed successfully
Right-click the tray icon for quick controls: start/stop recording, open settings, or quit the app.
Set WhisperClick to start with Windows
Enable Start with Windows in Settings so WhisperClick is always ready when you need it. It launches quietly in the tray – no window pops up.
Always-on-top for reference
If you use WhisperClick as a reference window (to see your history or past transcriptions while working), enable Always on top in Settings. The window stays visible above other apps.
Searchable history
Every transcription is saved automatically. Open the history panel to:
- Search through all past transcriptions
- Replay the original audio
- Copy any transcription to your clipboard
- Export a transcription as a .txt file
- Edit titles to organize important transcriptions
History is stored locally on your machine and capped at 500 entries.
Translate on the fly
Set the output mode to Translate or Both, pick a target language, and speak in your native language. WhisperClick transcribes and translates in one step. This is useful for drafting messages in a language you can speak but prefer not to type in.
Troubleshooting
“Windows protected your PC” (SmartScreen)
This is a standard Windows warning for software that is not yet code-signed. It does not mean the software is dangerous.
Fix: Click More info, then click Run anyway. This only happens on the first launch.
macOS says the app “can’t be opened”
macOS Gatekeeper blocks apps from unidentified developers by default.
Fix: Go to System Settings > Privacy & Security, find the WhisperClick message, and click Open Anyway. Or right-click the app in Finder and select Open.
My API key is not working
- Check for extra spaces. When you copy-paste a key, stray whitespace at the beginning or end can cause validation to fail. Try deleting the key and pasting it again carefully.
- Make sure you copied the full key. API keys are long strings. If your key was cut off, it will not validate.
- Check your provider account. Make sure your OpenAI or Gemini account is active, has billing set up (if required), and that the key has not been revoked.
- Try generating a new key. If your current key does not work, create a fresh one on your provider’s dashboard.
No audio is being recorded
- Check your microphone selection. In WhisperClick Settings, look at the Microphone dropdown and make sure the correct input device is selected.
- Check system permissions. On macOS, make sure WhisperClick has permission to access the microphone (System Settings > Privacy & Security > Microphone). On Windows, check Settings > Privacy > Microphone.
- Test your microphone. Open another app (like Voice Recorder on Windows or QuickTime on macOS) and make sure your mic is working at all.
- Try a different microphone. If you have multiple audio inputs, switch to another one in the dropdown.
Transcription is blank or inaccurate
- Speak clearly and at a normal volume. Very quiet or very loud audio can reduce accuracy.
- Check your language setting. If source language is set to the wrong language, accuracy drops significantly. Try setting it to Auto-detect if you are unsure.
- Try a different model. Some models handle certain languages or accents better than others. Switch models in Settings and try again.
- Reduce background noise. Close windows, move away from fans or machinery, or use a headset with a dedicated microphone.
Auto-paste is not working
- Make sure auto-paste is enabled. Check Settings – the Auto-paste toggle should be on.
- Click into the target app first. Before pressing the hotkey, make sure the target application is focused and your cursor is in a text field.
- Some apps block simulated paste. A small number of applications (certain terminals, secure input fields, some games) block programmatic paste. In these cases, the text is still copied to your clipboard – just press Ctrl+V manually.
The hotkey does not work
- Check for conflicts. If another application is using the same key combination, WhisperClick’s hotkey may not register. Change your hotkey in Settings to an unused combination.
- Try a different hotkey. Safe suggestions: Ctrl+Alt+R, Ctrl+Alt+W, F9, F10, Shift+F9.
- Make sure WhisperClick is running. Check your system tray – you should see the WhisperClick icon. If not, launch the app.
The app feels slow or freezes during transcription
- Check your internet connection. Cloud transcription (API mode) requires a stable connection. If your connection drops mid-recording, transcription may time out.
- Try a faster model. Smaller models like GPT-4o Mini Transcribe or Gemini 2.5 Flash Lite are faster at the cost of slightly lower accuracy.
- In local mode, try a smaller model. Larger Whisper models need more CPU/RAM. If your machine struggles, switch to a smaller model.
The pill widget disappeared
- Check Settings. The “Show pill widget” toggle may be off. Turn it back on.
- Check the tray menu. Right-click the tray icon – there may be a “Show Pill” option.
- It may be on another monitor. If you recently disconnected a display, the pill might be positioned off-screen. Change the pill monitor setting in Settings, or toggle it off and back on to reset its position.
Getting Help
- Report a bug or request a feature: Open an issue on GitHub
- Website: whisperclick.com
We read every issue and piece of feedback.